
Complete guide | Host WordPress on Microsoft Azure

If you are thinking about hosting WordPress on Microsoft Azure, you probably already know about both tools. But before we start with the integration guide, let’s take a brief look at both solutions.
What is Microsoft Azure?

Microsoft Azure is a cloud computing services platform offered by Microsoft. It allows individuals and organizations to host and manage applications, websites, and databases, as well as store and share data and files.
What is WordPress?

WordPress is an open-source content management system (CMS) used to create and manage websites and blogs easily and interactively. It was first released in 2003 and has since become one of the most popular CMSs on the web. It is used by bloggers, small businesses, non-profit organizations, large corporations, and many other individuals and entities around the world.
Advantages of hosting WordPress on Microsoft Azure
Let’s take a look at the advantages and benefits of hosting WordPress on Microsoft Azure.
Scalability
Azure is a scalable platform that can handle websites of any size. With Azure, we can easily scale our website as our business grows, without worrying about performance or capacity issues.
Security
Azure has multiple built-in security measures to protect our data and that of our users. We can also configure additional security measures, such as SSL certificates, to ensure the security of our website.
Reliability
Azure guarantees 99.95% uptime and provides backup and disaster recovery solutions to ensure that our website is always available to our users.
Integration
Azure integrates easily with other Microsoft services, such as Office 365, allowing us to share data and resources between our applications more efficiently.
Personalisation
Azure provides a wide range of configuration and customisation options to meet the specific needs of our WordPress website. This will allow us to customise our website according to our needs and preferences.
Cost efficiency
With Azure, we only pay for the resources we use, which means we can save money on infrastructure and server management costs.
How to host WordPress on Microsoft Azure?
Once we have reviewed both tools and know the advantages they bring together, it is time to start with the step-by-step deployment.
Step 1: Sign up for Microsoft Azure
To enjoy Microsoft Azure services you need to be registered, so the first step is to create an account. You can register from its official website: https://azure.microsoft.com/en-gb/.
Step 2 : Create a resource
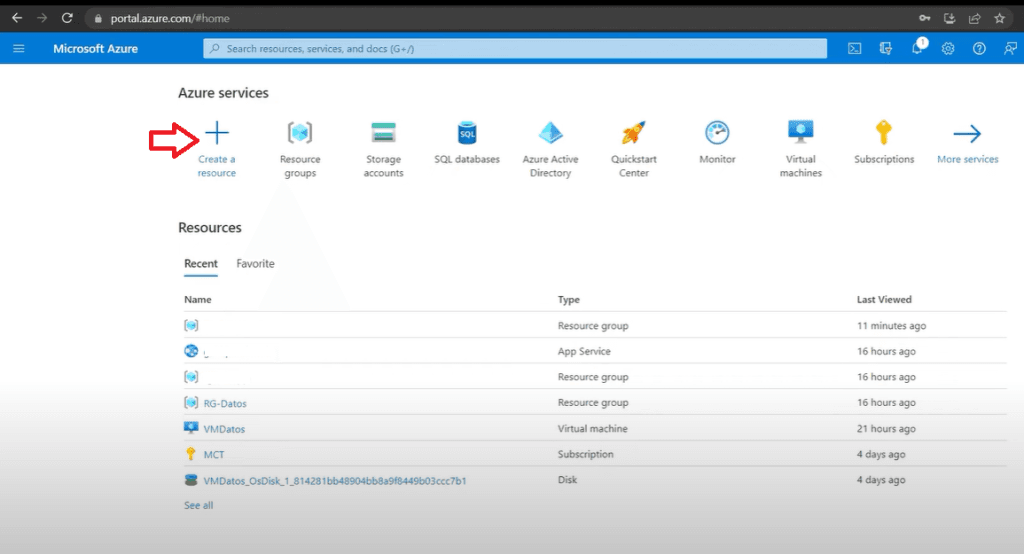
Once we have accessed the Microsoft Azure portal, we click on the top left button and click on “Create a resource“.
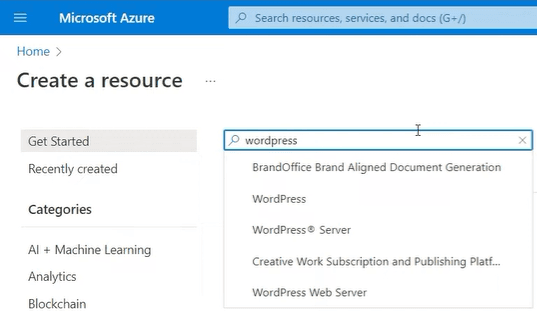
Once inside we look for the WordPress resource.
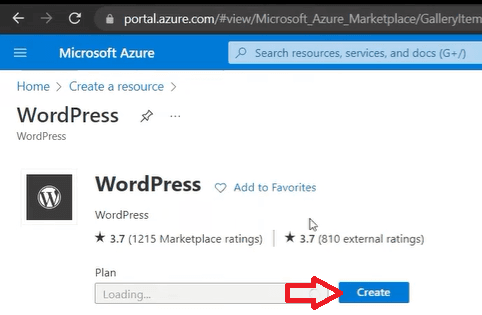
Within the WordPress resource, we press the “Create” button.
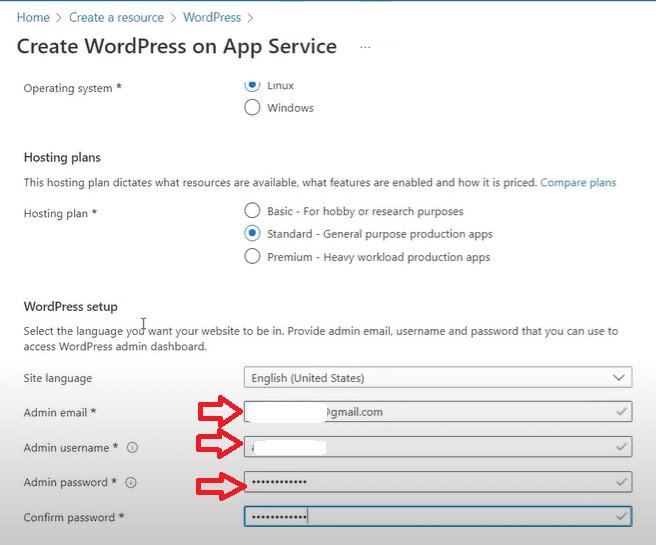
Next, we enter the data we want our WordPress to have and select your plan. We can find three types of plans:
- Basic: For hobby or research purposes.
- Standard: General purpose applications
- Premium: High workload applications
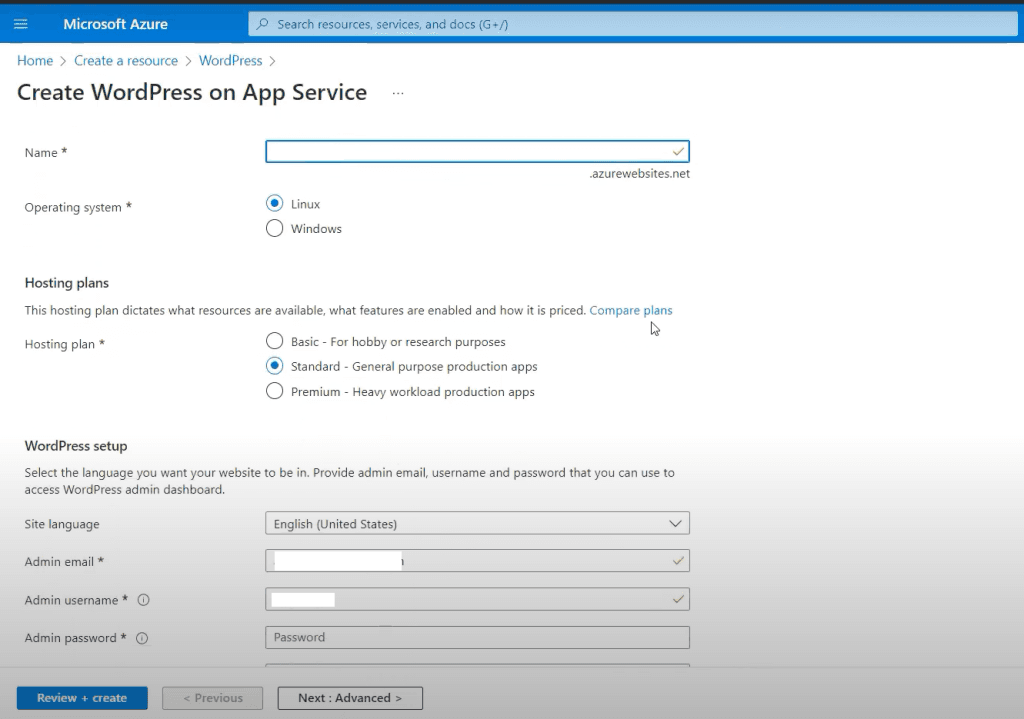
Once we have entered and reviewed our data we press the “Review + create” button.
If everything went correctly, you will be shown this message “Your deployment is complete“. You have now created your WordPress hosted in Azure.
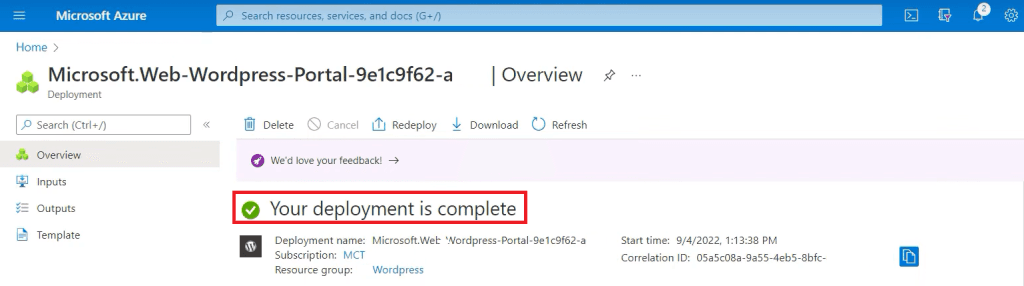
Step 3 | Configure the resource
Press the “Go to resource” button.
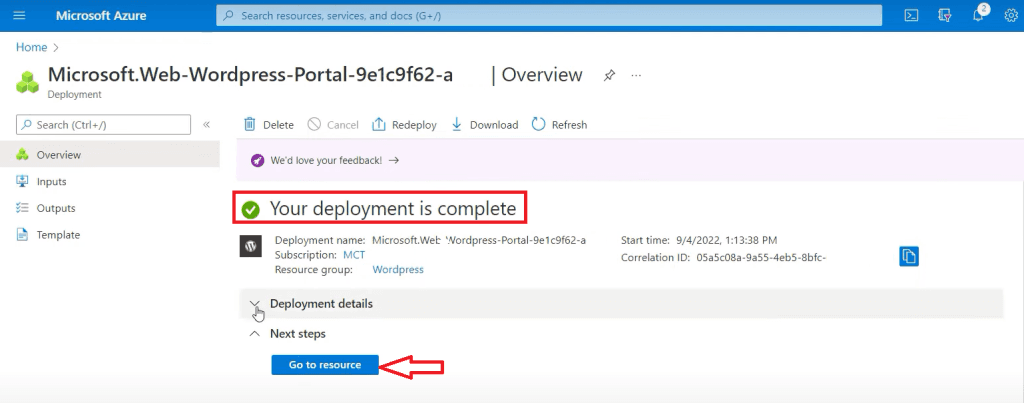
And it will redirect us to the control panel of our resource. Within this panel, we will be able to manage and view information about our WordPress.
From this panel, we will be able to take actions on WordPress such as stopping it, restarting it, deleting it, etc. And consult information such as its status, location, URL, etc.
But for now, we will access the link that is located in the URL section. This link is our WordPress page.
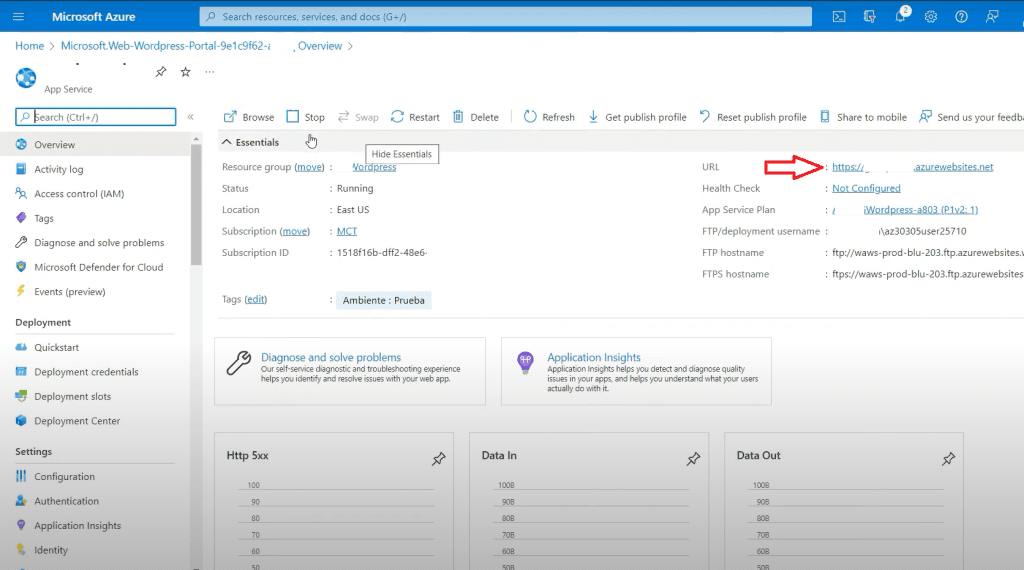
Step 4 | We access to our WordPress
When you click on the link, the following screen will appear. Our WordPress is currently being installed.
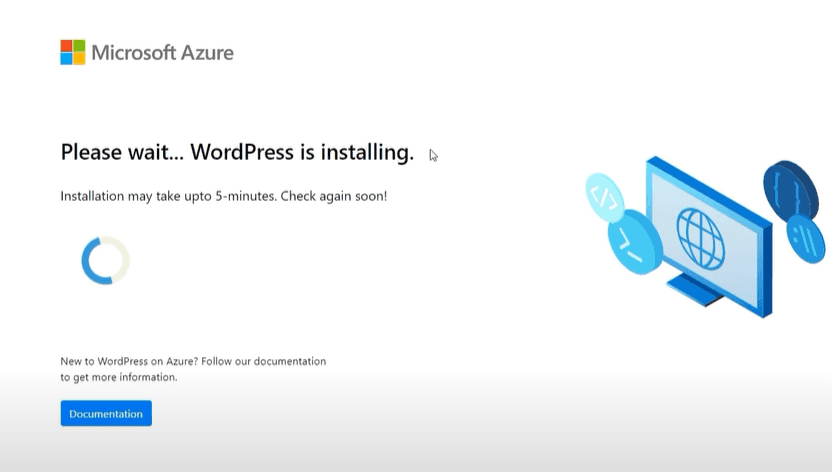
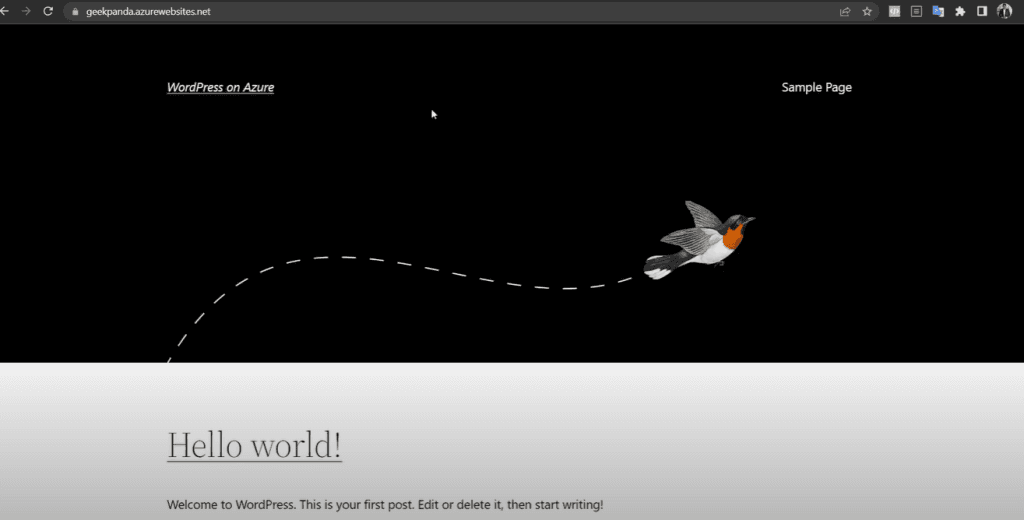
When the installation is finished, our WordPress site will automatically open with a default template.
Step 5 | Edit our WordPress
We already have our WordPress template in Azure, but now how do we edit it?
To edit our WordPress from the link we had we added “wp-admin” behind it.
The link should look something like this:
WordPress name + azurewebsites.net/wp-admin
Inside this wp-admin login screen, we will log in with the credentials we entered in step 2 creating the resource.
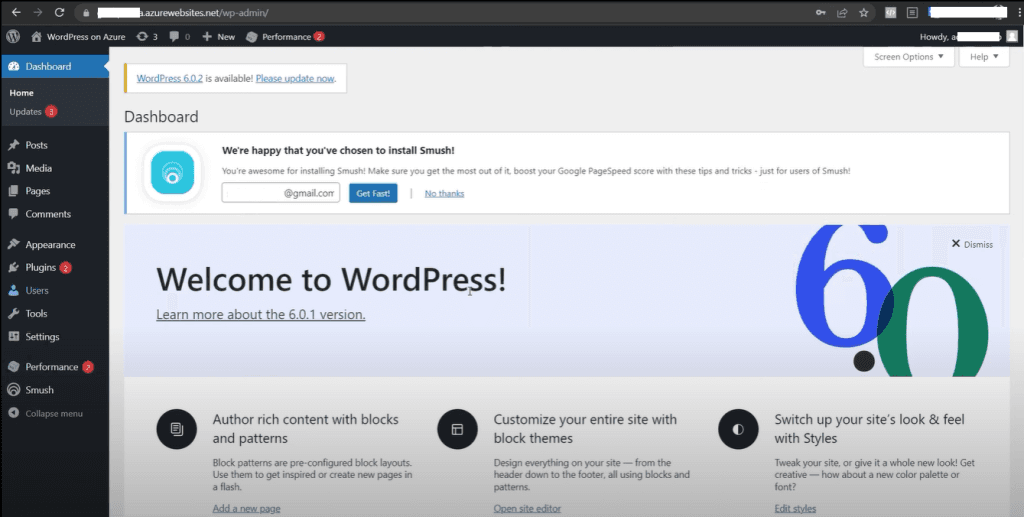
Finally, within the administration panel of our WordPress, we will be able to edit the website to our liking.
If you have any questions, you can access codex.wordpress.org, the official WordPress website where you will find all the documentation, guides, and tutorials to learn how to use WordPress.
Is it advisable to have WordPress in Microsoft Azure?
In conclusion, we can say that creating a WordPress website in Microsoft Azure is a relatively simple and quick process, especially if you already have experience using Azure.
Microsoft Azure provides us with a wide range of configuration and customization options to meet the specific needs of our WordPress website.
And having WordPress on Microsoft Azure gives you a platform that is scalable, secure, reliable, and integrated with other Microsoft solutions. This allows you to customize and manage your website efficiently and effectively.