How to Integrate ChatGPT into Visual Studio Code to Boost Your Productivity

Discover how to integrate ChatGPT into Visual Studio Code to optimize your workflow and enhance your productivity as a developer.
A few weeks ago, ChatGPT launched an exciting extension that enables seamless integration with Visual Studio Code. This powerful combination provides you with instant responses, solutions, guidance, and suggestions, all without leaving your code editor.
ChatGPT is an artificial intelligence-based language model developed by OpenAI, which uses natural language processing techniques and neural networks to generate coherent and contextually relevant responses from text inputs.
Visual Studio Code (VSCode) is a source code editor developed by Microsoft. It includes support for debugging, built-in Git control, syntax highlighting, intelligent code completion, snippets, and code refactoring. It is customizable, allowing you to change the editor’s theme, keyboard shortcuts, and preferences. It is free and open-source, although the official download is under proprietary software and includes custom features by Microsoft.
Take advantage of this innovative integration and take your software development to the next level!
Extension Installation
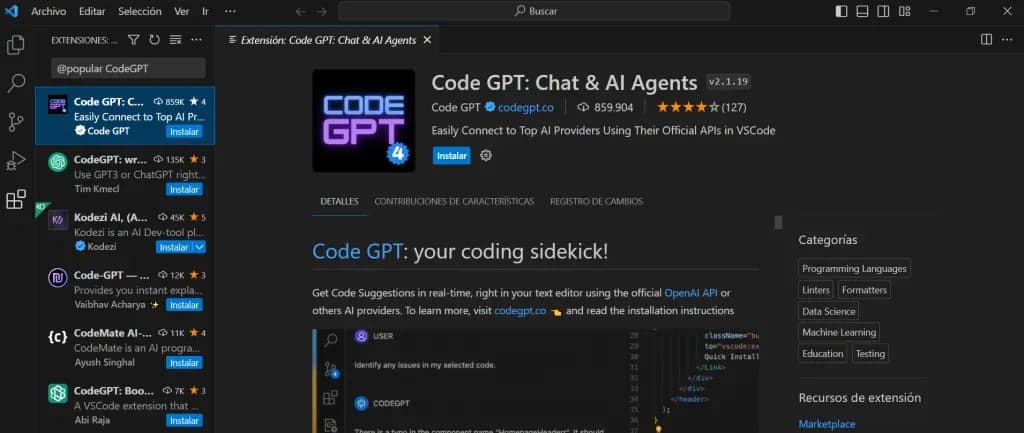
To integrate ChatGPT, the first thing you should do is open Visual Studio Code and go to the extensions section. In the search bar, type ‘CodeGPT’ and proceed to install the extension.
Once the extension is installed, we’ll need to configure it to use it properly. Let’s see how to do it in the next section.
Configuration of the API Key for Integrating ChatGPT in Visual Studio Code
To use ChatGPT in Visual Studio Code, we need an API key that allows us to access the OpenAI service. Without this key, the extension won’t work.
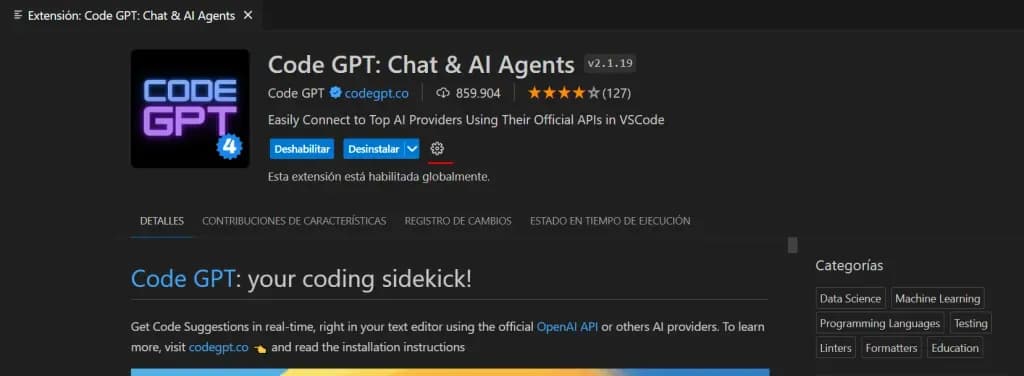
It is crucial to configure the API key correctly to integrate ChatGPT into Visual Studio Code. Once we have the extension installed, we should configure it. Click on the settings button that you’ll find on the extension installation screen, and then select “Extension Settings”.
What we need to do now is create an API key that we will use to connect ChatGPT with Visual Studio Code. Without this key, the extension won’t function.
To create the API key, click where it says “API Key”, and you will be redirected to your OpenAI account. If you don’t have an account, sign up to obtain one.
Next, navigate to the “API Keys” section and select ‘Create New Secret Key.’ Copy the generated key and return to Visual Studio Code.
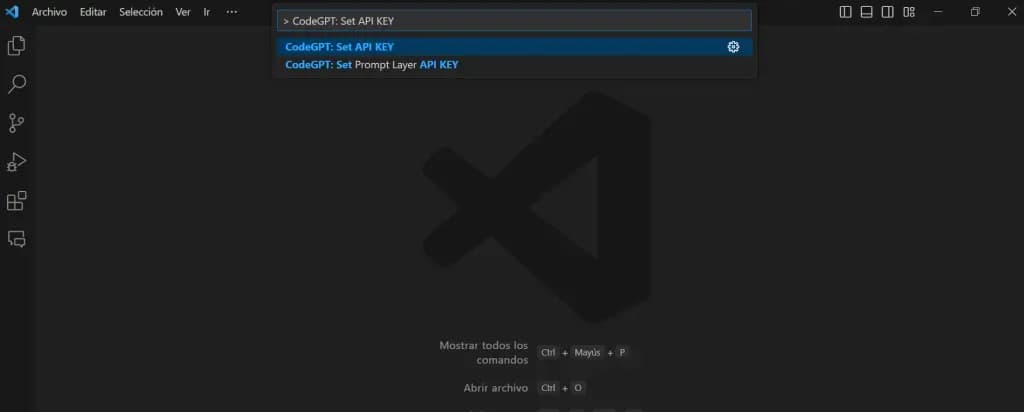
Now that we have the API key, we can enter it in Visual Studio Code to activate ChatGPT. To enter the API key, press Cmd + Shift + P on Mac or Ctrl + Shift + P on Windows to open the command palette. Then, search for ‘CodeGPT: Set API KEY’ to set the API key.
Save by pressing Enter. Finally, reload VSCode to start using ChatGPT.
Now that everything is set up, we can move on to the more interesting section: using ChatGPT to generate, refactor, and document code with artificial intelligence. Let’s see how to do this in the next section.
Using ChatGPT in Visual Studio Code to Generate, Refactor, and Document Code
ChatGPT is a powerful tool that allows us to generate, refactor, and document code with artificial intelligence. We can use ChatGPT in two ways: through the use of comments or by using the CodeGPT chat window. Let’s explore each of them in detail.
Code Generation when Integrating ChatGPT in Visual Studio Code
You can generate code with CodeGPT by using comments or by using the CodeGPT chat window. To do this, write a comment about what you would like CodeGPT to do. Then, press Ctrl + Shift + I, and CodeGPT will open a window with the solution.
To generate code by chatting with CodeGPT, click on the CodeGPT chat icon on the left sidebar. This will open a chat window.
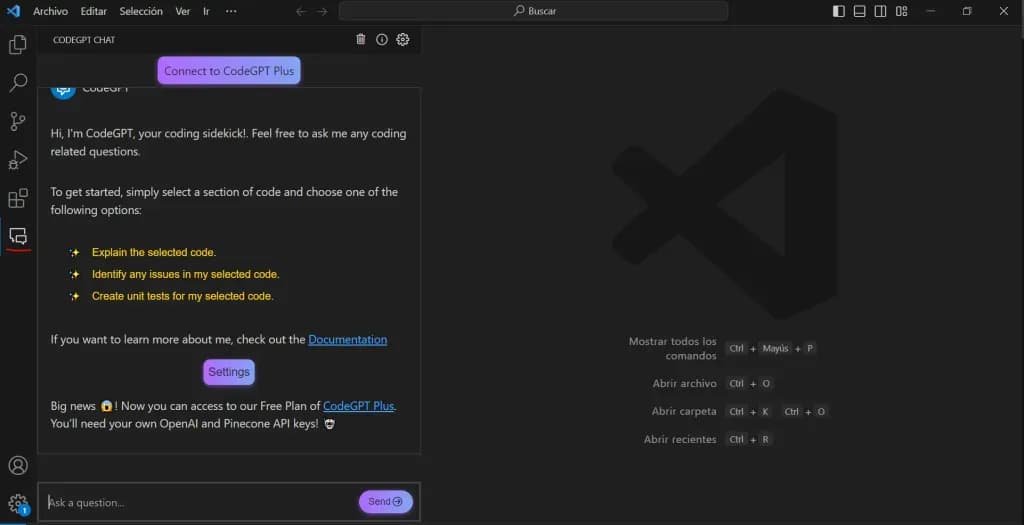
Then, enter a question, and it will generate the response in the chat window itself.
Code Refactoring when Integrating ChatGPT in Visual Studio Code
If you want to refactor the code, select the code you want to refactor, then right-click on it and select “Refactor CodeGPT”. In the dialog box, you can add a message describing the refactoring you want to perform. For example, “refactor to use a for loop instead of a while loop”.
Code Explanation when Integrating ChatGPT in Visual Studio Code
To explain a code snippet, select the code you want CodeGPT to explain. Then, right-click on the highlighted code and select the “Explain CodeGPT” option. It will open a dialog box with the explanatory text.
Code Documentation when Integrating ChatGPT in Visual Studio Code
If you want to document the code, select the code, then right-click on it and select the “Document CodeGPT” option. CodeGPT will generate code documentation in the chat window.
Supported Programming Languages
ChatGPT can generate code in various programming languages. You can use it to write code in languages like Python, JavaScript, HTML, CSS, PHP, and many more. Additionally, with the ability to quickly generate code snippets, productivity can be increased, and the development process can be accelerated. This allows you to focus on more complex and strategic tasks.
Limitations and Precautions when Using ChatGPT in Visual Studio Code
While integrate ChatGPT into Visual Studio Code, it is essential to consider some aspects. It does not automatically guarantee the quality, efficiency, or correctness of the generated code. It may not always provide the correct information. Therefore, it is necessary to verify the results for correctness.
Some situations where ChatGPT might fail or generate unwanted results are:
- When the question or comment is ambiguous, incomplete, or contradictory. For example, if you ask ChatGPT to generate a function that calculates the area of a circle but do not specify the radius value or the variable name that stores it, ChatGPT might generate incorrect or inconsistent code.
- When the question or comment is too complex or specific. For example, if you ask ChatGPT to generate a function that implements an advanced algorithm or uses a library or framework it does not know, ChatGPT might generate incomplete, incorrect, or irrelevant code.
- When the question or comment is about a topic unrelated to programming or software development. For example, if you ask ChatGPT to generate a cooking recipe or explain the theory of relativity, ChatGPT might provide a nonsensical or out-of-context response.
For these reasons, it is recommended to use ChatGPT with caution and always verify the results before using or sharing them. ChatGPT should not be blindly trusted or used as a substitute for the knowledge and experience of a programmer.
However, these limitations and precautions should not deter you from taking advantage of the integration of ChatGPT in Visual Studio Code, a unique opportunity to enhance your productivity as a developer.
Make the most of the integration of ChatGPT in Visual Studio Code
As you can see, the integration of ChatGPT in Visual Studio Code is an incredible tool that allows you to generate, refactor, and document code with artificial intelligence. With this powerful combination, you can optimize your workflow, increase your productivity, improve the quality of your code, and address your questions without leaving your code editor.
Don’t miss the opportunity to take your software development to the next level! Make the most of the integration of ChatGPT in Visual Studio Code and discover how you can simplify your workflow and achieve faster and more accurate results.